
Rhyno Hu
December 12, 2025
12 min
Rhyno Hu
December 12, 2025
12 min
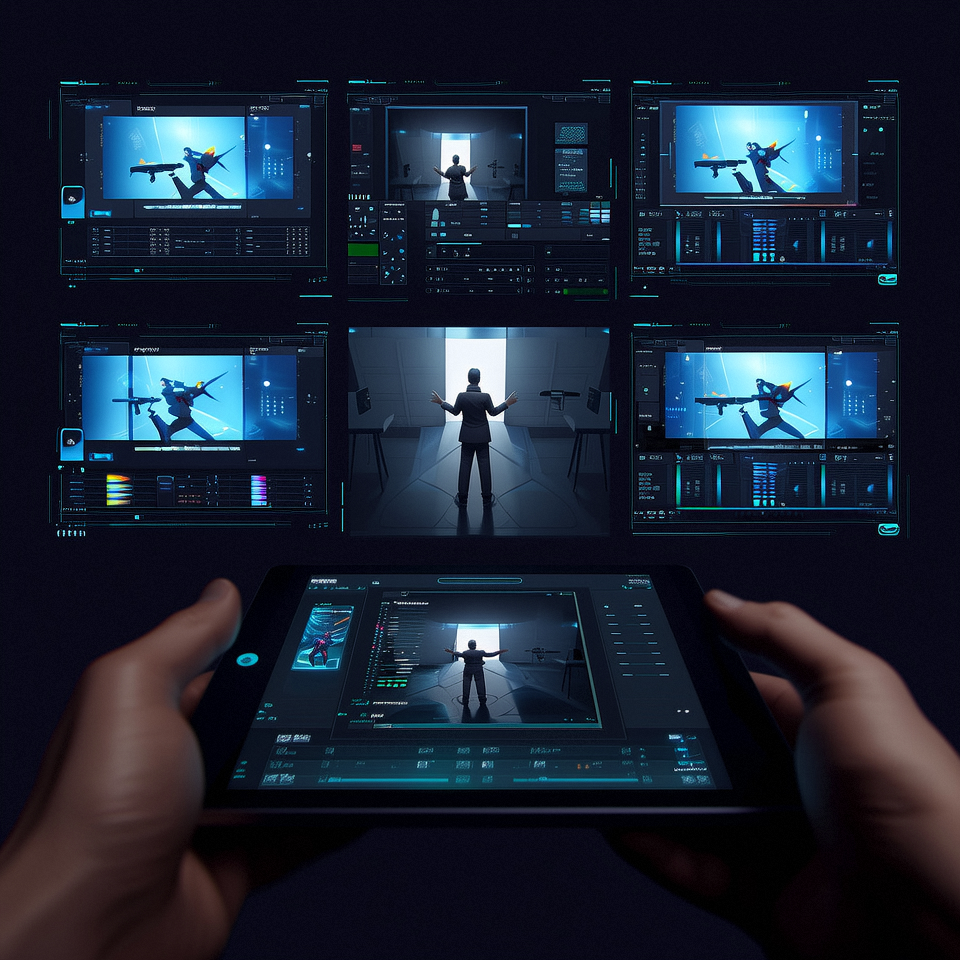
Storyboarding gives creators a simple way to plan scenes, shape ideas, and show clear actions. When you add camera editing tools to this process, you gain stronger control over the final look of your story. Camera editing improves clarity, improves timing, and improves visual flow. It helps you adjust scenes fast, correct weak shots, and develop new ideas without starting over.
This article explains how camera editing strengthens your storyboard. It also explains how VeeSpark Camera Editor features improve your workflow.
Camera editing in storyboarding refers to the ability to modify, enhance, and transform individual shots after creation. This approach differs from starting over or accepting imperfect frames.
You work with existing visual assets. You make targeted changes. You maintain project momentum. This process saves hours compared to traditional revision methods.
The technology serves multiple purposes. You adjust compositions. You refine character appearances. You test different visual approaches. You ensure consistency across your narrative sequence.
Storyboards communicate your vision to team members, stakeholders, and collaborators. Clear visuals prevent misunderstandings. They align everyone's expectations. They reduce costly production errors.
Camera editing enhances this communication. You can emphasize specific elements in a frame. You can adjust lighting to highlight important details. You can modify angles to show exactly what you mean.
A director reviewing your storyboard sees precise intentions. An animator understands exact character positions. A cinematographer grasps the desired mood and atmosphere. This clarity comes from your ability to refine each shot until it communicates perfectly.
Visual precision matters most during pre-production. Changes cost little at this stage. Camera editing tools let you explore options quickly. You test ideas. You compare alternatives. You select the strongest visual choices.
Creative work requires experimentation. Initial ideas evolve. Better solutions emerge through iteration. Camera editing supports this creative process.
You start with a basic storyboard. You review the sequence. You identify opportunities for improvement. You make changes without penalty. This freedom encourages bold creative choices.
Traditional methods punish experimentation. Each revision requires significant time investment. Artists hesitate to try new approaches. Projects settle for "good enough" rather than "excellent."
Camera editing removes these barriers. You test multiple lighting schemes. You try different character positions. You explore various background options. You compare results and choose what works best.
This flexibility extends throughout your production timeline. Script changes happen. Director notes arrive. Client feedback requires adjustments. Camera editing tools let you respond quickly and effectively.
Storyboard refinement often requires small but crucial changes. A character needs to move slightly left. The horizon line should sit lower. A prop requires better visibility.
Precision adjustment tools handle these modifications. You select specific areas. You apply targeted changes. You maintain the integrity of surrounding elements.
These tools include:
Cropping and framing controls let you adjust composition without affecting image quality. You reframe shots to improve visual balance. You remove distracting elements at frame edges. You focus attention on story-critical details.
Color correction features modify mood and atmosphere. You adjust brightness to simulate different times of day. You change color temperature to shift emotional tone. You balance colors across multiple shots for visual consistency.
Scale and position tools refine element placement. You resize characters for better proportions. You move objects to improve composition. You align elements across consecutive frames.
Rotation and perspective adjustments correct angles and viewpoints. You straighten horizons. You adjust camera tilt. You modify perspective to match production requirements.
These precision tools work non-destructively. You can undo changes. You can compare before and after versions. You can fine-tune adjustments until they meet your standards.
Visual storytelling often requires additional elements. Text annotations explain action. Arrows indicate movement. Effects convey mood or genre.
Overlay capabilities add these elements to your storyboard frames. You place text directly on images. You draw attention to specific details. You clarify complex sequences.
Motion indicators show character or camera movement. Simple arrows or lines demonstrate action flow. These visual guides help readers understand dynamic sequences from static images.
Atmospheric effects enhance mood communication. You add fog for mystery. You include rain for dramatic tension. You apply lighting effects for specific times of day. These overlays make your storyboard more evocative and communicative.
Filter effects modify the overall look of shots. You apply cinematic color grades. You create sketch or watercolor styles. You match different artistic approaches to project requirements.
Layer management lets you control these additions. You can show or hide overlays. You can adjust their opacity. You can modify them independently from the base image.
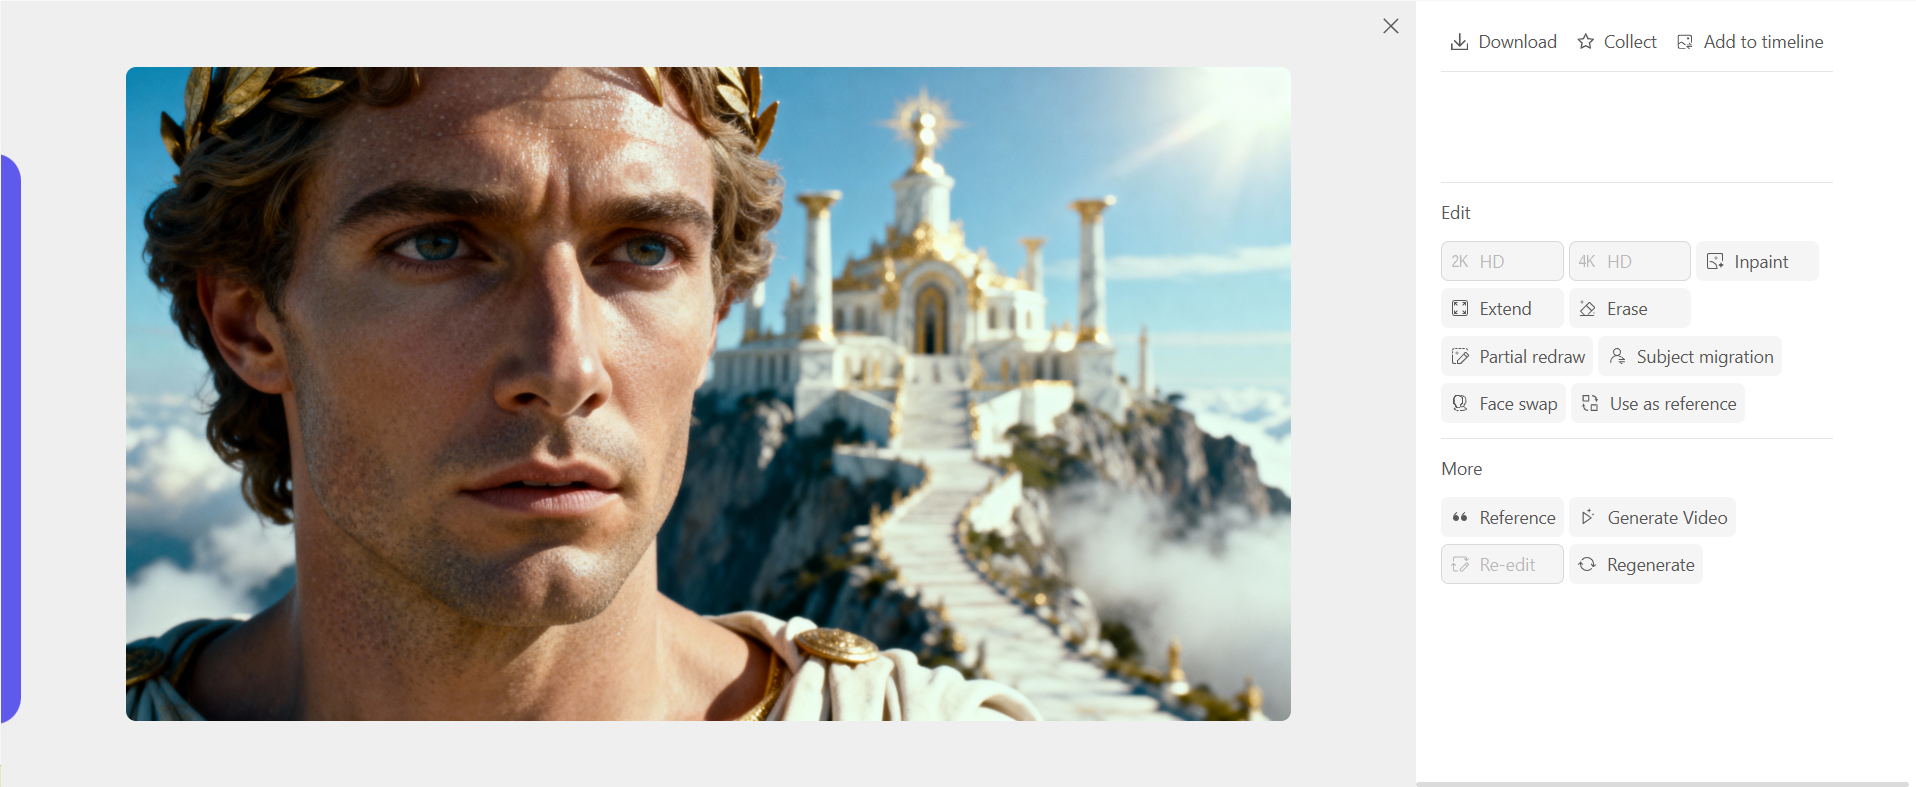
Inpainting solves a common storyboard problem: unwanted elements in otherwise perfect shots. An extra character appears in the background. A modern object sits in a period scene. A prop doesn't match the final production design.
Inpaint tools remove these elements cleanly. You select the unwanted area. The system fills it with content that matches the surrounding image. The result looks natural and seamless.
This feature saves enormous time. You don't redraw entire frames. You don't recreate complex backgrounds. You simply remove the problem and continue working.
Extend features expand your frame boundaries. You need more space on the left side. The top of the frame cuts off important elements. The composition would work better with different proportions.
Extend tools generate additional image area that matches your existing visual style. The system analyzes your current frame. It creates new content that blends naturally with what you already have. You gain composition flexibility without starting over.
Sometimes you need to remove elements completely. Other times you need to replace specific portions of an image while keeping everything else intact.
Erase functions delete selected areas. You might remove a character to test the composition. You might clear background elements to try different options. You might eliminate props that don't serve the story.
Partial redraw takes this further. You select an area. You provide new instructions. The system regenerates only that portion while preserving the rest of your image.
This capability proves invaluable for character refinement. The facial expression doesn't match the emotion you need. You select just the face area. You redraw with the correct expression. The character's body, clothing, and surroundings remain unchanged.
Background modifications work the same way. You need to change what's outside a window. You select that specific area. You redraw with the new view. The interior scene stays exactly as you created it.
Props and objects benefit from partial redraw. A weapon doesn't match your final design. A vehicle needs to change models. A piece of furniture should look different. You modify these elements individually without touching the rest of your carefully composed frame.
Character consistency challenges every storyboard artist. The same character should look identical across hundreds of frames. Small variations create visual confusion. Viewers notice these discrepancies.
Subject migration addresses this issue. You establish a reference character appearance. The system applies this appearance across multiple shots. Your character looks consistent throughout your storyboard.
This feature handles different angles and lighting conditions. The character turns their head. The lighting changes from scene to scene. Camera distance varies. Subject migration maintains recognizable character features through all these variations.
Face swap technology takes this further. You need the same character showing different emotions. You've created perfect expressions in separate images. Face swap lets you combine the best elements.
You select a source face with the desired expression. You apply it to a target image with the correct body position and scene composition. The result combines the strengths of both images.
This proves especially useful for dialogue scenes. Characters need multiple expressions within a single sequence. Creating each from scratch takes substantial time. Face swap lets you build a library of expressions and apply them as needed.
Visual consistency extends beyond individual characters. Your entire storyboard should maintain a cohesive look. The artistic style should match throughout. The mood and atmosphere should feel unified.
Style reference control ensures this consistency. You select a reference image that captures your desired visual approach. The system analyzes this reference. It applies similar visual characteristics to new images you generate or modify.
This feature works across different subjects and compositions. Your reference might show a specific lighting style. That lighting approach appears in all your subsequent frames. Your reference might demonstrate a particular color palette. Those color relationships carry through your entire storyboard.
Directors appreciate this consistency. They see a unified visual presentation. They understand your creative vision more clearly. They make better-informed decisions about the final production.
Style reference also helps when multiple artists contribute to a single project. Different creators work on different sequences. Style reference keeps their work visually aligned. The final storyboard looks like it came from a single source.
Complex storyboards require multiple versions of similar shots. You need the same scene from different angles. You want to show the same moment with different framing. You're exploring alternative visual approaches to a sequence.
Image fission generates these variations from a single source image. The system creates multiple versions. Each version maintains key elements from the original. Each version presents a different perspective or composition.
This capability accelerates exploration. You create one strong frame. You generate variations. You review all options. You select the version that best serves your story.
The variations maintain visual consistency. Characters keep their appearance. Lighting remains similar. The overall mood stays constant. Only the specific elements you want to vary actually change.
This approach works well for action sequences. You choreograph a fight or chase. You want to show the same moment from multiple camera angles. Image fission generates these angles while keeping the action consistent.
It also serves dialogue scenes. You establish a conversation setup. You need different shot sizes: wide, medium, close-up. Image fission creates these variations from your master frame.
Production storyboards often require complete coverage of a scene. Directors need to see every planned camera angle. They want to understand how shots will cut together. They need to plan actor blocking and camera movements.
Multi-angle generation creates this coverage efficiently. You start with a base composition. You specify the angles you need: over-the-shoulder, reverse angle, profile, overhead, low angle. The system generates each perspective.
These generated angles maintain consistency. Characters appear in the same positions. Props and set elements stay in correct spatial relationships. Lighting remains appropriate for each viewpoint.
This feature helps you plan complex scenes. You can visualize how an entire sequence will flow. You can identify coverage gaps. You can ensure you're capturing all necessary dramatic beats.
It also facilitates collaboration. Cinematographers see exactly what angles you envision. Production designers understand what portions of the set will appear on camera. Everyone works from the same clear visual plan.
Character recognition remains one of the biggest storyboard challenges. Your protagonist should look the same in frame one and frame one thousand. Viewers track characters visually. Inconsistency breaks immersion and confuses audiences.
Camera editing tools address this through reference systems. You establish character appearances early in your process. You save these as references. You apply them consistently as your storyboard develops.
Clothing, hair, and physical features remain stable. The character ages appropriately if your story spans time. They show appropriate changes when the story requires them. Otherwise, they maintain their established appearance.
This consistency extends to secondary and background characters. Supporting roles need recognizable appearances. Extras should look appropriate for their environment and time period. Camera editing helps you maintain these details without constant manual checking.
Visual continuity extends beyond characters. Locations should look consistent across multiple shots. Time of day should progress logically. Weather and lighting should match unless your story requires changes.
Camera editing features help track and maintain these elements. You establish location references. You note time-of-day lighting. You document weather conditions. You apply these consistently across all relevant frames.
Set decorating and props need similar attention. A clock on the wall should show time progression. Items that characters move should appear in their new locations. Details that establish period or setting should remain present and correct.
Color continuity matters significantly. Interior scenes maintain consistent color schemes. Exterior scenes show appropriate changes only when moving between locations or time periods. Camera editing tools let you apply color references across multiple frames to ensure this consistency.
Modern storyboarding often connects directly to video production. Your static frames become the foundation for animated sequences or live-action planning. AI video models bridge this gap.
These models convert your storyboard frames into video sequences. They add motion based on your compositions. They animate characters and camera movements. They provide a preview of how your static boards will translate to moving images.
This capability proves valuable during pitch presentations. Stakeholders see animated versions of your storyboards. They understand motion and pacing more clearly. They make better decisions about approving or revising your plans.
The generated video maintains your storyboard's visual style. Character appearances stay consistent. Lighting and mood carry through. The animation serves your storytelling rather than overwhelming it with unnecessary movement.
You control the level of animation. Some shots might show simple camera moves. Others might include character animation. You decide what serves your presentation needs.
Sometimes you have video reference that informs your storyboard. Perhaps you shot test footage. Maybe you found reference material that captures the right mood. You might have animatics from previous projects.
Reference video mode lets you extract frames from video sources. You select specific moments. You capture them as still images. You use these as starting points for your storyboard frames.
This workflow saves time. You don't recreate compositions that already exist. You don't guess at complex camera angles. You work from concrete visual examples.
The captured frames become editable storyboard images. You modify them using all the camera editing tools discussed earlier. You adjust elements to match your specific needs. You combine reference material with original creation.
This approach works well for matching live-action footage. You might be planning additional scenes for an existing production. You extract frames from the shot footage. You create new storyboard frames that match the established visual style.
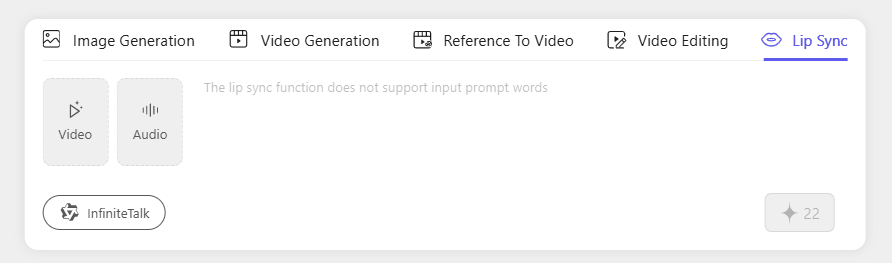
Dialogue scenes present specific challenges in storyboarding. Static images struggle to convey the rhythm and energy of conversation. You need to communicate speech patterns, emotional delivery, and character interaction.
Lip sync animation adds this dimension to your storyboard frames. You provide dialogue audio. The system animates character mouths to match the speech. Your static storyboard transforms into an animated dialogue sequence.
This feature helps directors and voice actors. They hear the dialogue while seeing the visual presentation. They understand timing and delivery more clearly. They make better choices about performance and pacing.
The animation quality serves storyboard purposes. It shows mouth shapes and timing. It demonstrates character interaction. It doesn't aim for final production quality, but it communicates effectively at the planning stage.
You can test different dialogue deliveries. Try the line fast. Try it slow. Compare how different pacing affects the scene's energy. Make informed decisions before production begins.
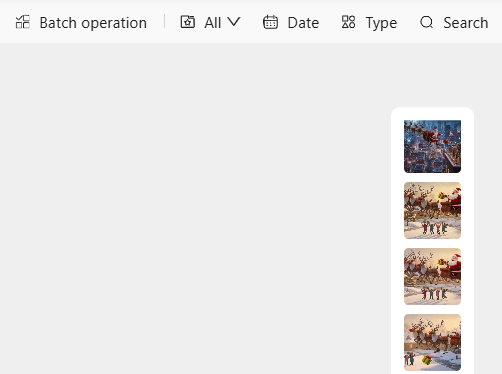
Professional storyboards contain hundreds or thousands of frames. Managing these assets requires robust organization tools. You need to find specific shots quickly. You need to understand sequence flow. You need to maintain version control.
Timeline views show your entire storyboard chronologically. You see the sequence flow. You identify pacing issues. You spot visual repetition or gaps in coverage.
Shot organization tools let you group frames by scene, sequence, or character. You work on all shots featuring a specific character. You refine an entire action sequence together. You maintain consistent visual approaches across related frames.
Naming and tagging systems help you find shots quickly. You tag frames by location, time of day, or mood. You name sequences clearly. You add notes about specific requirements or changes.
Version control tracks your revisions. You save different versions of problematic shots. You compare approaches. You revert to earlier versions if new directions don't work. You maintain a clear record of creative decisions.
Large projects benefit from search capabilities. You need to find all exterior shots. You want to locate every frame featuring a specific character. You're looking for shots that use a particular location.
Search functions filter your storyboard based on criteria you specify. You enter search terms. You select tags or categories. The system shows only matching frames.
Batch operations let you apply changes to multiple frames simultaneously. You've refined a character's appearance. You want to update fifty shots featuring that character. Batch operations make this possible without manually editing each frame.
Color corrections work well in batches. You've decided to shift the overall mood of a sequence. You select all relevant frames. You apply the color adjustment. The entire sequence updates at once.
This efficiency matters on tight schedules. You can respond to major feedback quickly. You can implement style changes across your entire project. You maintain control over large volumes of visual content.
Camera editing tools offer many capabilities. Using them effectively requires strategic thinking. Focus your efforts where they matter most.
Start with story clarity. Your primary goal remains communicating narrative effectively. Use camera editing to serve this goal. Don't let technical possibilities distract from storytelling fundamentals.
Establish your visual style early. Create reference frames that capture your desired look. Use these references to maintain consistency as you work. This approach saves time and produces more cohesive results.
Work in passes. Complete a rough storyboard first. Review the entire sequence. Identify specific frames that need refinement. Apply camera editing tools to these problem areas rather than trying to perfect every frame immediately.
Prioritize character consistency. Audiences forgive many technical issues but notice character inconsistencies quickly. Use face swap and subject migration features to maintain character appearances throughout your board.
Test readability. Show your storyboard to someone unfamiliar with the project. Can they follow the story? Do they understand character motivations? Can they track action sequences? Use camera editing to clarify any confusing elements.
Save your work frequently. Complex editing projects can develop technical issues. Regular saves protect your progress. Version control helps you experiment without fear of losing good work.
Camera editing power can lead to specific problems. Awareness helps you avoid these issues.
Over-editing weakens visual impact. Perfect can become the enemy of good. Know when a frame communicates effectively. Stop refining and move forward. Endless tweaking delays completion without improving results.
Inconsistent quality looks unprofessional. Your storyboard doesn't require uniform finish levels across all frames. However, dramatic quality differences distract viewers. Maintain baseline quality throughout your board.
Ignoring production realities causes problems later. Your storyboard might show impossible camera angles. It might depict impractical locations. Camera editing makes anything visually possible. Production limitations still apply. Consider practical constraints as you create.
Forgetting your audience creates communication failures. Different stakeholders need different information from storyboards. Executives might need mood and story flow. Cinematographers need technical details. Production designers need set and prop references. Use camera editing to address your specific audience's needs.
Neglecting file organization leads to chaos. Name files clearly. Organize folders logically. Tag frames appropriately. These simple practices prevent confusion and wasted time searching for specific shots.
Skipping collaboration hurts the final product. Show work in progress to team members. Get feedback early. Use camera editing to address notes efficiently. Isolation produces less effective storyboards than collaborative refinement.
Social media requires constant visual content. Platforms favor video. Audiences scroll quickly. Your content must capture attention immediately.
Camera editing accelerates social content creation. You start with storyboard frames. You refine compositions for social formats. You adjust aspect ratios for different platforms. You optimize visual impact for small screens and brief viewing times.
The tools let you test variations quickly. You create three versions of a frame with different focal points. You review all three. You select what works best. This speed matters when posting schedules demand daily or weekly content.
Brand consistency becomes manageable. You establish visual styles. You apply them across all content. Your social presence maintains coherent appearance despite high posting frequency.
Animation features add motion to static frames. Short animated clips perform well on social platforms. You convert storyboard frames to brief videos. You add simple movements. You create engaging content without complex animation workflows.
Advertising requires multiple creative variations. You test different approaches. You compare performance. You optimize based on results.
Storyboard camera editing supports this testing workflow. You create base frames. You generate variations. You test different headlines, product positions, or visual styles. You measure which approaches perform best.
The speed advantage matters significantly. Traditional ad creative development takes days or weeks per variation. Camera editing produces variations in hours. You respond to market feedback faster. You adapt campaigns based on performance data.
Client presentations benefit from polished storyboards. Advertising clients often lack production experience. They struggle to visualize finished ads from rough boards. Camera editing produces presentation-ready frames that communicate creative concepts clearly.
Consistency across campaign elements becomes straightforward. You maintain visual coherence across print, video, and digital formats. You ensure brand guidelines apply throughout. You deliver unified campaigns that reinforce brand identity.
Pure AI storyboard generation starts with text prompts. You describe scenes. The system creates visual frames. This approach speeds initial concept development dramatically.
Camera editing enhances AI-generated boards. The initial AI output might miss specific requirements. Characters might not look exactly right. Compositions might need adjustment. Camera editing tools refine these AI-generated starting points.
This combination provides the best of both approaches. AI handles initial creation speed. Camera editing ensures results meet your specific needs. You get both efficiency and control.
The workflow suits tight deadlines. You need a complete storyboard quickly. You generate initial frames with AI. You spend your limited time refining key frames that require perfection. Supporting frames get lighter touch-ups. The result meets deadline and quality requirements.
Animation pre-production depends on detailed visual planning. Animators need clear references. They need to understand timing, character positions, and camera movements.
Camera editing creates these references efficiently. You build detailed storyboards. You refine character designs. You establish consistent appearances. You provide animators with clear visual targets.
The ability to generate multiple angles helps animation planning. You show how scenes will cut together. You demonstrate camera coverage. You help animation directors plan their shot sequences effectively.
Character consistency features prove especially valuable. Animation demands perfect character consistency. Camera editing tools help establish and maintain character model sheets. You ensure every frame shows characters correctly.
Style reference controls maintain visual cohesion. Animation projects often involve multiple artists working on different sequences. Style references keep everyone's work visually aligned. The final animation maintains consistent artistic approach throughout.
Film pitches require compelling visual presentations. You need to sell your vision. You need stakeholders to understand your creative approach. Strong storyboards make or break pitch meetings.
Camera editing creates pitch-quality boards quickly. You develop your concept visually. You refine key moments. You show climactic scenes with maximum impact. You communicate tone and style effectively.
The tools let you respond to pitch feedback. Studio executives suggest changes. You incorporate their notes quickly. You show revised boards in follow-up meetings. This responsiveness demonstrates professionalism and creative flexibility.
Multi-angle generation helps pitch presentations. You show how sequences will cut together. You demonstrate visual variety. You prove you've thought through technical execution.
Video generation from storyboards adds presentation impact. Animated boards communicate more effectively than static frames. Motion helps non-visual stakeholders understand your vision. You increase your chances of getting projects greenlit.
Scripts provide narrative structure. Storyboards add visual dimension. Converting scripts to boards traditionally requires extensive manual work.
AI tools accelerate this conversion. You input script pages. The system generates initial storyboard frames. Camera editing refines these frames to match your vision precisely.
This workflow suits episodic production. Television series need constant storyboard production. Scripts arrive weekly. You need boards quickly for pre-production planning. AI generation plus camera editing refinement meets these tight schedules.
The approach also helps script analysis. You visualize different scenes. You identify potential production challenges. You spot pacing issues. You make script revisions based on visual insights.
Directors benefit from seeing script interpretations. Different directors might visualize scenes differently. Camera editing lets you quickly create variations. You explore different visual approaches. You find what serves the story best.
Camera editing gives creators stronger control over storyboards. It improves clarity, improves communication, and improves scene continuity. It also saves large amounts of time by replacing slow manual edits.
VeeSpark Camera Editor supports this process with:
Advanced edit tools
Precision controls
Strong style consistency
Fast fixes
Multi-angle generation
Smooth video preview tools
Creators can build stronger storyboards by using these features. Clear storyboards help teams understand your ideas with ease. Experiment with camera editing to create panels that show your vision in a clean and direct way.
Camera editing means adjusting existing storyboard frames to improve composition, clarity, and consistency without recreating them from the start.
These tools save time, improve communication, increase clarity, and support fast changes during production.
Yes. Features like subject migration and face swap keep character features stable across all frames.
Inpainting removes unwanted elements and fills the space with matching content, so you don’t redraw complete frames.
Yes. Multi-angle generation creates new views of the same scene while keeping characters and props accurate.